PII Identity Scan
Overview
PII Identity Scan is a specialized scan type that associates PII findings with identifiable individuals. Unlike a standard PII scan, which only detects personal data, an Identity Scan links each piece of PII (SSNs, phone numbers, emails, etc.) to the person it belongs to, based on names found nearby in your documents.

Example output:
Fred Smith: employee-list.xls: SSN, Address, Phone
Greg Jones: employee-list.xls: SSN, Address, Phone
Greg Jones: contacts.pdf: Address, Phone
Amy Miller: customer-data.doc: Drivers License, Credit Card, Phone
This is useful for GDPR compliance, data subject access requests, or understanding exactly whose personal information exists in your files.
How It Works
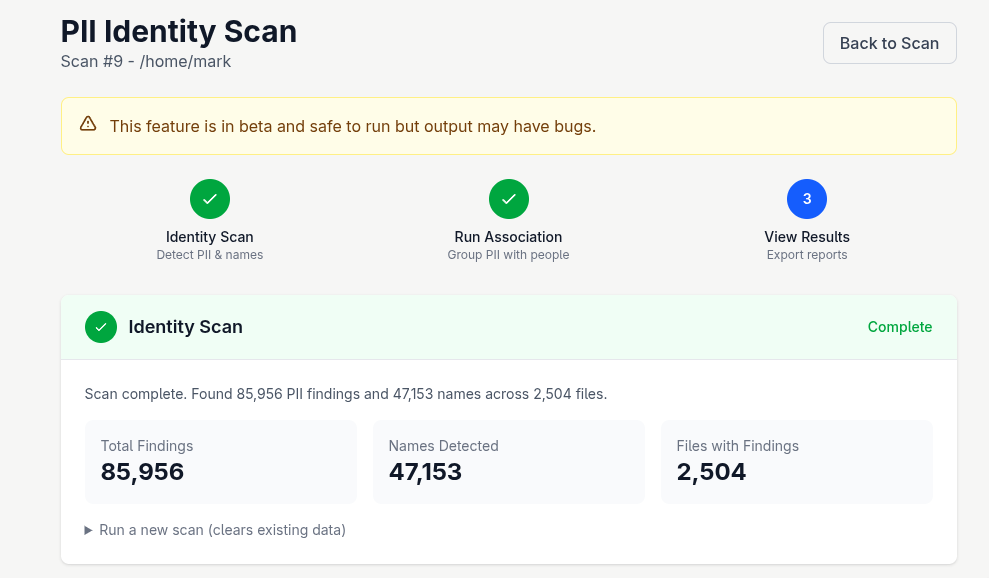
The PII Identity Scan operates in three phases:
Phase 1: Identity Scan
Detects all configured PII types along with full names in your files. The scan stores the position of each finding along with surrounding context (the text around each match).
Phase 2: Association Processing
Groups PII findings with detected names based on proximity rules. For example, if "John Smith" appears on the same line as "123-45-6789", the SSN is associated with John Smith.
Phase 3: Results & Reporting
Browse results grouped by person, mark false positives, and export CSV reports.
Starting a PII Identity Scan
- From your scan's overview page, click Identity scan at the top of the page
- Give the run a Run name (e.g. "GDPR Audit January 2025") and choose an association method. The Character distance method adds a Max distance (characters) box
- Click Start identity scan
The scan runs in the background and shows real-time progress including:
- Current file being processed
- Number of findings and names detected
- Any errors encountered
- Elapsed time
What it looks for
An identity scan does not re-detect PII. It re-reads the files your PII scan already found something in, looks for full names in them, and links the findings that scan recorded to the names it finds nearby. So the PII types it can associate are the ones the original scan was configured to detect: to associate credit cards, run the PII scan with credit cards turned on first.
Full names are matched against US name lists (see First Name), so the anchor has to be a name PII Crawler recognises.
Association Methods
The method is chosen on the start form, and the run applies it as it goes: detection and association are one step, not two.
-
Same line - Associates PII found on the same line as the name. Best for structured data like spreadsheets or CSV files where each row contains one person's data.
-
Character distance - Associates PII within a configurable number of characters from the name. Useful for documents where related information spans multiple lines but stays close together. You can set the maximum distance (default: 200 characters).
-
Same paragraph - Associates PII found in the same paragraph (separated by blank lines) as the name. Good for documents with clear paragraph separation.
The distance is measured in characters, not bytes, words or lines. Whitespace, punctuation, and all other characters count toward it. A character counts as one character whatever alphabet it is written in, so a 200-character window reaches the same distance in an English document, a German one and a Japanese one.
A maximum distance of 0 is refused before the run starts. No finding can sit in a window of no characters, so the run would link nothing and finish reporting no associations over a file full of names. Leave the box at 200 if you are not sure, or set it to the largest gap you want to reach across. The box applies to Character distance only; Same line and Same paragraph ignore it.
You can start as many runs as you like with different names, methods and distances. Each is saved and viewed independently, so you can compare methods on the same files. A run re-reads the files, so a second run on a large scan takes about as long as the first.
Viewing Results
By Person View
The main results view shows all detected people with:
- Number of files containing their PII
- Count of PII items found
- Types of PII detected (shown as colored badges)
Click View details on any person to see their complete PII breakdown.
Person Details
Shows all PII for a specific person, organized by file:
- Each file is listed with the number of PII items
- Every finding carries the method that linked it and, for a distance run, how many characters it sat from the name
- Click Show context on a finding to read the surrounding text it was found in, with the match highlighted
Unassociated Findings
The Unassociated count shows PII that couldn't be linked to any name. Click View to see these findings. This happens when:
- PII appears in files without detected names
- PII is too far from any name (based on your association method)
- The person's name is not one PII Crawler recognises. Names are matched against US name lists covering roughly nine out of ten people in the United States (see First Name), so a scan of data about people outside that population can find plenty of PII and still associate none of it. A run that reports names detected as 0 is the signal.
The names themselves are not listed here: a name match is the person, not PII still waiting to be linked to one.
Marking False Positives
If the scan incorrectly identified something as PII, you can mark it as a false positive. Click the Mark as FP dropdown on any finding and choose a scope:
- This finding only - Hides just this specific occurrence in this file
- All "[text]" - Hides all occurrences of this exact text everywhere in this run
- [Name] + [type] - Hides all PII of this type for this person (e.g., all SSNs for "John Smith")
False positives are scoped to the association run. They do not affect other runs.
Exporting Reports
Click Download CSV to export results. The CSV includes:
- Full Name
- File Name
- PII Types found
- Ambiguous flag (if multiple names were near the PII)
Reports automatically filter out findings you've marked as false positives.
In the TUI, press e on a run to export the same report. A Save to box asks where the file should go, with a default name in the directory you started the TUI from; Enter writes it, Esc cancels, and a file already at that path takes a second Enter to overwrite. The file lists people by name against the PII found near them, so it is written readable by you only (mode 0600 on Linux and macOS).
Tips for Best Results
- Start with Same line association for spreadsheets and structured data
- Use Paragraph association for documents with clear paragraph structure
- Create multiple runs to find the best method for your data
- Review unassociated findings to catch PII that needs manual review
See also
- DSAR Walkthrough: the end-to-end flow that uses identity-scan output as its index
piicrawler dsar: query an identity-scanned database from the CLI- Triaging Findings: false-positive handling for regular scans