Scan Gmail For PII
If an attacker got into your email tomorrow, what could they walk out with? Your email address and full name are obvious. But how about your social security number typed into a tax-prep email five years ago, or a copy of your driver's license sent to a landlord? Most people have no idea.
This guide takes you from a fresh Gmail export to a triaged list of every piece of PII Gmail is keeping on you.
1. Export your Gmail data
- Sign in to Gmail.
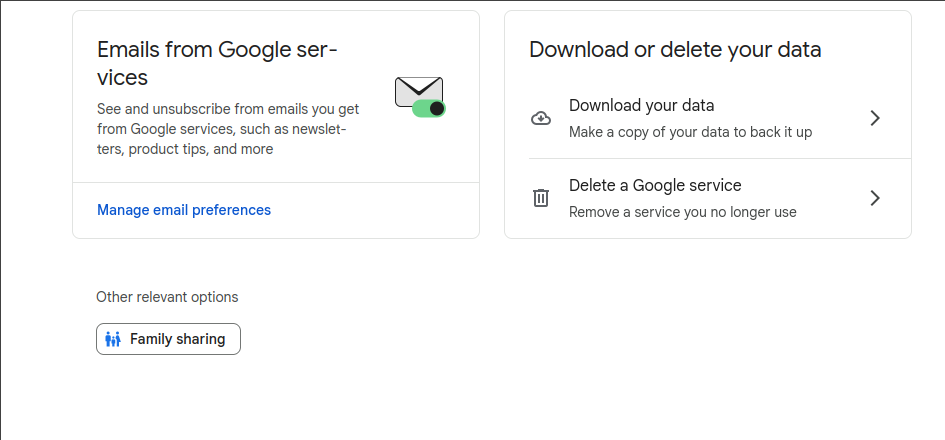
- Open Google Takeout.
- Click Deselect all.
- Scroll down and check only Mail.
- Click Next step.
- Choose Send download link via email as the delivery method.
- Pick .zip and a 2 GB max file size. (Larger mailboxes are split across multiple zips — that's fine, you scan them all the same way.)
- Click Create export. Google says it can take a few hours to a day.
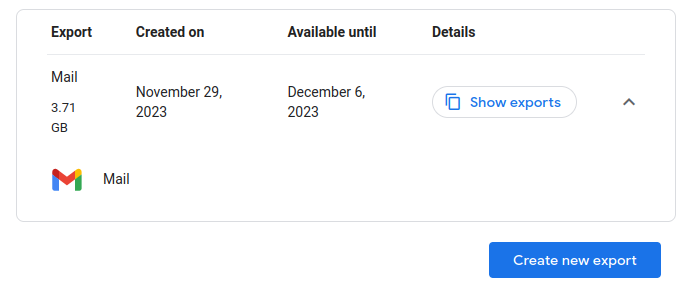
When the email arrives, download the zip and unpack it. Inside, look for one or more .mbox files — typically All mail Including Spam and Trash.mbox. PII Crawler reads MBOX directly, so you don't need to convert anything.
2. Run a one-shot scan
The fastest path is the CLI. Point piicrawler scan at the directory containing the MBOX file and stream findings to a JSONL file:
piicrawler scan ~/Downloads/Takeout/Mail \
  --workers 4 \
  --out gmail-findings.jsonl
Each line of gmail-findings.jsonl is a ScanResult with the shape documented in the CLI Reference. MBOX files are scanned one message at a time, so you get one JSONL line per message, with the message's ordinal (and Message-ID, when present) appended to the file path:
{"file_path":"/home/you/Downloads/Takeout/Mail/All mail Including Spam and Trash.mbox::message-000042::<[email protected]>","findings":[{"type":"ssn","term":"078-05-1120","start":1234,"end":1245},{"type":"email","term":"[email protected]","start":1300,"end":1316}],"full_names":[{"normalized":"Jane Doe","original_text":"Jane Doe"}],"char_count":48219}
The ::message-NNNNNN suffix is a 1-based ordinal padded to six digits, so JSONL output sorts in mailbox order. Messages without a Message-ID: header keep just the ordinal. Findings stream to disk as each message completes, so even a multi-gigabyte MBOX produces output you can tail -f while it scans.
Filter with jq to get a quick sense of what's in there:
jq -c '.findings[] | select(.type == "ssn")' gmail-findings.jsonl
jq -c '.findings | group_by(.type) | map({type: .[0].type, count: length})' gmail-findings.jsonl
For a flat report you can hand to a spreadsheet, write CSV instead:
piicrawler scan ~/Downloads/Takeout/Mail --out gmail-findings.csv
The format is auto-detected from the .csv extension; see CLI Reference → CSV format for the column layout.
3. (Optional) Search for your own identity
The built-in detectors catch every SSN, credit card, address, and the like. To also flag references to you specifically — your last name, an old employee ID, an account number a vendor used in receipts — give PII Crawler a terms list to check alongside the regular detectors.
Terms lists are managed in the TUI or web UI rather than by CLI flag, so this part is interactive:
- Run
piicrawler(no arguments) to open the TUI. - Press t to open Terms Lists, then n to create a new list called e.g.
me. - Add the strings you want to flag, one per line:
(That second line is the famous historical SSN that ended up on millions of demo wallets — substitute your own.)Whitcher 078-05-1120 078051120 ACCT-4421-XX - Press Esc to return to the scan list, then n to start a new scan. In the new-scan form, press Ctrl+T to attach the
meterms list, set the path to your TakeoutMail/directory, and start the scan.
Findings from the terms list show up alongside the built-in PII types in the same scan, with pii_type set to terms-list-me (your list name, lowercased and dashed). You can triage them with the same workflow as everything else — see Triaging Findings.
4. Triage and act
Open the scan in the TUI (press Enter on the row in the scan list) and walk through findings. The fastest path is Review mode (r) inside the Findings view, which gives you single-key verdicts on every match. See Triaging Findings for the full workflow.
For each real finding, the file_path will look something like:
/home/you/Downloads/Takeout/Mail/All mail Including Spam and Trash.mbox::message-000042::<[email protected]>
That tells you exactly which message in the MBOX the finding came from. The Message-ID is the same one Gmail uses internally, so if you paste it (with the angle brackets) into Gmail's search box prefixed with rfc822msgid:, Gmail jumps you straight to the original. If a message had no Message-ID header, only the ordinal will be appended.
You can also open the MBOX in your mail client of choice (Thunderbird imports it directly), or use the surrounding context PII Crawler captured to find the original message: jump back into Gmail, search for distinctive phrases from the context, and decide whether to delete the message, redact the attachment, or leave it.
If you delete messages, remember to empty Trash afterward — Gmail keeps deleted messages in Trash for 30 days by default, and they remain searchable to anyone with access to your mailbox.
What gets scanned inside the MBOX
PII Crawler walks every message in the MBOX and extracts:
- Headers worth scanning:
From,To,Cc,Bcc,Subject,Reply-To. - Text and HTML message bodies for every part of every message.
- Attachments, decoded from base64 / quoted-printable. PDFs (with OCR fallback for scanned ones), Office documents, plain text, and the rest of the supported file types are all extracted in place. Zip attachments are unpacked and their contents scanned recursively.
In other words, a PDF of your driver's license that you emailed yourself is scanned the same as if it sat on your disk. You don't need to extract attachments by hand.
Where to next
- Triaging Findings — review mode, false positives, exporting a clean CSV
- PII Identity Scan — link findings to specific people in your mailbox
- DSAR Walkthrough — same data, but searched by person rather than by file
- CLI Reference — every flag, including streaming output and CSV format